Skip to content
Adding a sump pump to an existing basement is one of the most effective ways to protect your home from water intrusion and long-term moisture problems. Whether your basement has already flooded or you’re simply being proactive, installing the right sump pump system helps prevent costly damage.
This guide walks you through everything you need to know—from determining whether you need a sump pump to choosing the right system and completing the installation.
Step 1: Determine If You Need a Sump Pump
Before starting your sump pump installation, consider whether your home needs one. Here are key indicators that installing a sump pump will be worth the investment:
Location
- Homes in low-lying areas or regions with heavy rainfall are more vulnerable to water buildup under the foundation.
Water Table and Soil Type

Foundation Type
Homes with concrete block foundations are more prone to water entry due to porous joints.
Older homes without existing drainage systems may benefit the most from a sump pump system.
In both cases, interior waterproofing offers a reliable way to manage groundwater and protect the basement from long-term damage.
Step 2: Choose the Right Sump Pump System
Once you’ve determined you need a sump pump, the next step is choosing a system that suits your basement conditions and budget. Each type of sump pump has its pros and cons.
Common Sump Pump Options:
Submersible Sump Pumps
- Installed directly in the sump pit and sits underwater
- Quieter, more powerful, and longer-lasting (especially in cast iron housing)
- Ideal for finished basements or areas with high water volume
Pedestal Sump Pumps
- Motor sits above the pit; only the pump is submerged
- Less expensive, easier to service
- Louder and not as durable as submersible models
Battery-Operated Sump Pumps
- Activates when the main pump loses power
- Crucial for protecting your home during power outages
- Many systems include a float switch to control when it turns on
Tip: Look for models with a cast iron core, a solid float switch, and at least a 1/3 or 1/2 HP motor. Some homes may require a 3/4 HP pump for higher volumes.
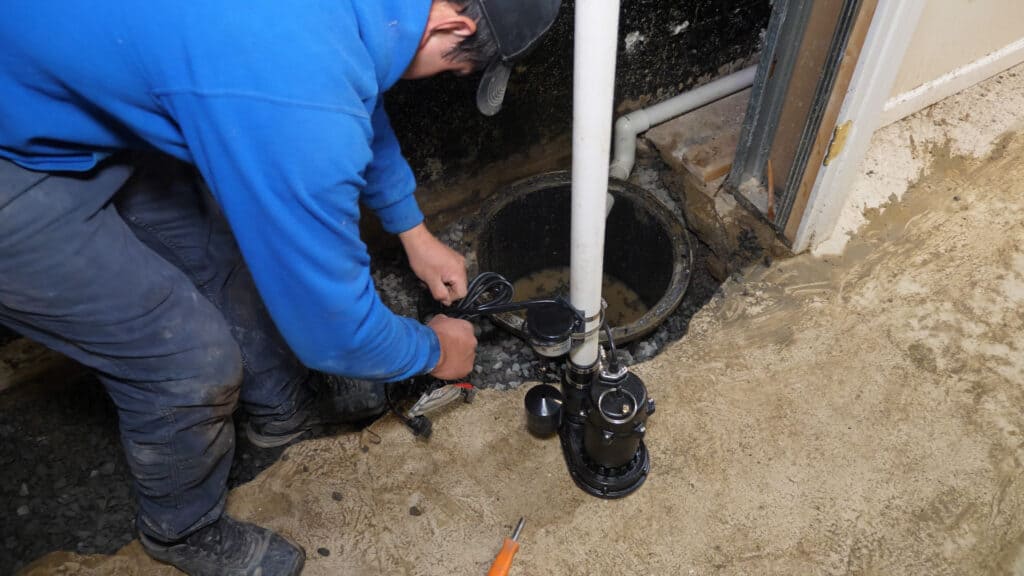
Step 3: Install the Sump Pump and Discharge Pipe
Installing a sump pump in an existing basement requires excavation, plumbing, and attention to detail. It’s not just about digging a hole—it’s about building a complete water removal system that protects your home.
Installation steps:
1. Dig a Sump Pit

- Locate the lowest point in your basement where water tends to collect
- Use a jackhammer if needed to break the concrete slab
- The pit should be deep enough to hold the sump basin and allow for drainage (typically 10–12 inches below floor level)
2. Install the Sump Pump Basin
- Place a perforated sump basin into the pit to allow water to enter while filtering debris
- Ensure it’s level and securely seated in the gravel

3. Install the Sump Pump
- Set the pump inside the basin and connect the float switch and power source
- Attach a check valve on the discharge line to prevent water from flowing back into the basin
4. Connect the Discharge Pipe
- Use PVC piping to direct water from the pump to the outside
- Ensure the pipe is pitched away from the foundation and ends in a dry well, storm drain, or approved outlet
Pro Tip: Seal any gaps around the discharge pipe penetration to prevent air or moisture leaks.
Step 4: Test the Sump Pump System

Before you finish, it’s essential to test the pump to ensure it works properly.
Testing Checklist:
- Plug the pump into a GFCI outlet
- Pour water into the basin until the float switch activates the pump
- Watch to ensure water is being discharged entirely outside
- Verify there are no leaks or reverse flow from the discharge pipe
If the system doesn’t activate, double-check the power connection, float switch clearance, and discharge line.
Step 5: Maintain for Long-Term Protection
A pump is only as reliable as the maintenance behind it. Regular care helps extend the life of your sump pump and ensures it works when you need it most.
Basic Maintenance Tips:
- Test the pump every 2–3 months by pouring water into the basin
- Clean out the basin yearly to remove silt, gravel, or debris
- Inspect the float switch to make sure it moves freely and isn’t obstructed
- Flush the discharge pipe to clear any blockages or ice (especially in winter)
- Replace backup batteries every 2–3 years
A high-quality sump pump system can protect your home from water intrusion for many years beyond the warranty if appropriately maintained.
Conclusion
Installing a sump pump in an existing basement is one of the most effective ways to protect your home from flooding, water intrusion, and long-term damage. Whether you’ve experienced basement leaks or want peace of mind, a sump pump system offers reliable, year-round protection.
If you’re unsure which type of pump is right for your home—or if you’d like a professional to handle the installation—schedule a free, no-obligation inspection and quote today.
We’ve helped thousands of Connecticut and Westchester homeowners protect their homes from the ground up. We’re just better.