
 You’ve probably wondered if DIY waterproofing can indeed save you a few bucks without compromising the quality. It’s true that by eliminating the labor costs associated with professionals, you could pocket some savings. But, how sure are you about achieving the same caliber of work? It’s crucial to reflect on your skill level, the complexity of the project, and the quality of materials you’re using. Making a mistake in any of these areas could lead to expensive future repairs. So, let’s talk about it: Can you truly balance cost-saving and quality in DIY waterproofing?
Key Takeaways
- DIY waterproofing can save money by eliminating professional labor costs, but personal time and skill level should be considered.
- Quality can be ensured in DIY waterproofing through careful selection of high-quality sealants, coatings, and waterproofing membranes.
- Considering the environmental impacts and conducting regular maintenance can enhance the durability and effectiveness of DIY waterproofing.
- Proper planning, surface preparation, and project management are essential to prevent common mistakes and ensure quality in DIY waterproofing.
- While DIY waterproofing can lead to significant cost savings, a cost-benefit analysis is necessary to weigh against the long-term benefits of professional services.
Understanding DIY Waterproofing
DIY Waterproofing isn’t some mythical beast you can’t tame. It’s a skill you can master with a bit of knowledge and practice.
The first thing you need to understand is that waterproofing isn’t a one-size-fits-all solution. Different waterproofing techniques are needed for different scenarios, and your choice of DIY materials will also vary.
For instance, you’d use a liquid waterproofing membrane for your shower, but for your basement walls, a cementitious waterproofing product might be your best bet. As a result, identifying the right technique and materials for your specific needs is an important first step.
You also need to realize that not all areas of your home may need waterproofing. It’s vital to assess your home thoroughly, identify potential problem areas, and then make a plan.
Remember, the key is to prevent water damage before it happens, not to fix it after the fact.
Also, remember that DIY waterproofing doesn’t mean going it alone. There are plenty of resources available, from online tutorials to home improvement books, to help guide you through the process.
In the end, understanding DIY waterproofing is all about learning, planning, and taking action.
Potential Cost Savings
You might wonder about the cost-effectiveness of DIY waterproofing.
Let’s start by evaluating the expenses you’ll encounter in a DIY approach.
We’ll also compare these with the costs of professional services, and uncover any hidden costs you may not have considered yet.
Evaluating DIY Costs
Diving into the financial aspect, let’s examine the potential cost savings of waterproofing your home yourself. Your budget evaluations will be a major factor. You’ll need to evaluate your material selection carefully to guarantee you’re getting the best quality for your money.
Labor expenses are another big part of the equation. When you do it yourself, you’re saving on the cost of hiring a professional. However, keep in mind that your own time is valuable too. You’ll need to assess if the project timelines align with your schedule and if the value evaluation weighs in favor of DIY.
Your skill level is also essential. If you’re not comfortable with the work, you may end up spending more in the long run to fix mistakes.
Here’s a simple table to take into account:
| Budget Evaluations | Material Selection |
|---|---|
| Labor Expenses | Project Timelines |
| Value Evaluation | Skill Level |
Professional Services Comparison
Comparing the cost of professional services to your DIY option offers a fuller picture of potential savings. It’s not just about the upfront costs, but also the long term benefits. Take into account expert insights, service comparison, and pricing analysis.
- Expert Insights: Professionals provide valuable advice based on years of experience. This can help you avoid costly mistakes and guarantee quality results.
They’re also more adept at material selection, choosing the best products for your specific needs.
- Service Comparison: Different companies offer varying prices for the same job. It’s essential to get multiple quotes for a fair pricing analysis.
Don’t forget to check warranty options which can provide additional value.
- Project Timelines: Professionals can often complete the job faster than a DIYer. Time is money – the quicker the job is done, the sooner you can enjoy your newly waterproofed space.
In the end, the decision comes down to your confidence in the DIY process versus the comfort of a professional doing the job.
Remember to reflect on not just the immediate savings, but also the quality assessment and long-term benefits.
Hidden Expenses Uncovered
Unmasking the hidden expenses associated with DIY waterproofing can reveal surprising cost savings. At first glance, you may only see the upfront costs of materials and your time.
Yet, you’re overlooking hidden costs like unexpected repairs and long-term maintenance expenses. High-quality materials may seem pricey, but they’ll save you money in the long run.
Settling for cheaper alternatives can lead to installation errors, causing unexpected repairs that’ll cost you more. So, don’t compromise on material quality.
You may be enthusiastic to finish your project, but rushing can extend project timelines and increase costs. It’s vital to plan your work carefully.
Implement effective planning strategies, considering labor and time investment. Labor considerations are essential too. DIY means you’re the worker, so your safety is paramount.
Investing in safety measures isn’t an expense; it’s a necessity. It could save you from costly medical bills due to accidents.
Lastly, remember maintenance isn’t a one-off thing. It’s a recurring cost, but it’s cheaper than dealing with the damage from skipping it.
In a nutshell, proper planning, material selection, and safety can unmask hidden costs and offer long-term savings. DIY waterproofing isn’t just about cutting immediate costs; it’s about smart spending.
Quality Concerns in DIY Waterproofing
While DIY waterproofing can save you money, it’s important to take into account the quality of the result.
You may face challenges due to lack of professional expertise or the use of cheaper materials.
Balancing cost with quality is a vital aspect that you can’t overlook in DIY waterproofing.
DIY Waterproofing Challenges
Faced with the task of DIY waterproofing, you might find yourself grappling with a few quality concerns. Here are some challenges you could face:
- Lack of Professional Knowledge: Not being a professional, you mightn’t know all the waterproofing techniques. This could lead to mistakes, wasting your time and money. Learning these techniques on your own can be challenging and time-consuming.
- Material Selection: With a myriad of materials available in the market, making the right choice can be overwhelming. Choosing the wrong material can compromise the quality of your waterproofing job.
- Missed Spots: Waterproofing needs to be thorough. Missing a spot can lead to water damage, mold, and other issues.
To overcome these challenges, you’ll need to invest time in learning and practicing the techniques. You’ll also need to research materials, understanding their benefits and drawbacks.
Finally, being meticulous in your work can help guarantee that you don’t miss any spots. Despite these challenges, with patience, research, and a careful approach, you can achieve a high-quality DIY waterproofing job.
It won’t be easy, but it’s definitely doable.
Cost Versus Quality
Balancing cost and quality in your DIY waterproofing project is a tricky feat. You may be lured by a lower price perception, but remember, material selection plays a huge role in the long-term durability of your project. Avoid cutting corners here.
Warranty implications are another factor to take into account. DIY work mightn’t come with the same coverage as professional service, which could cost you more in the long run. It’s crucial to evaluate your skill level honestly and contemplate the project scope. If it’s beyond your capabilities, hiring a pro might be a smarter choice.
Safety considerations are paramount in any DIY project. Don’t neglect them in the pursuit of saving a few bucks.
Your time investment is another factor to weigh. Do you have the time and patience to guarantee technique effectiveness?
Lastly, don’t overlook brand reputation when buying your waterproofing materials. Quality brands often deliver better results and offer more thorough warranties.
In the end, your DIY waterproofing project can save money without compromising quality if you approach it with an eye for detail and a realistic assessment of your abilities.
Essential Waterproofing Materials
Diving straight into the world of waterproofing, you’ll need to familiarize yourself with some vital materials. The right tools and materials can make the difference between a waterproofing project that stands the test of time and one that fails at the first sign of rain.
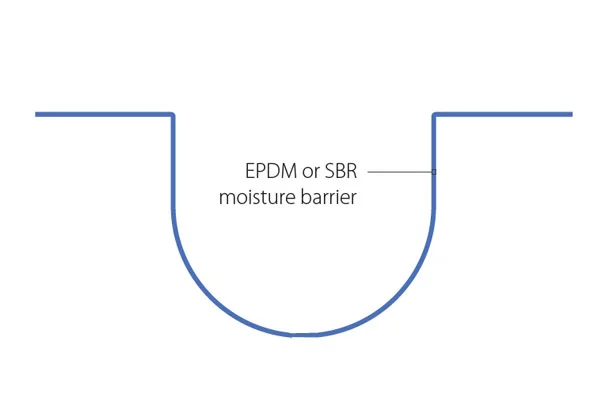
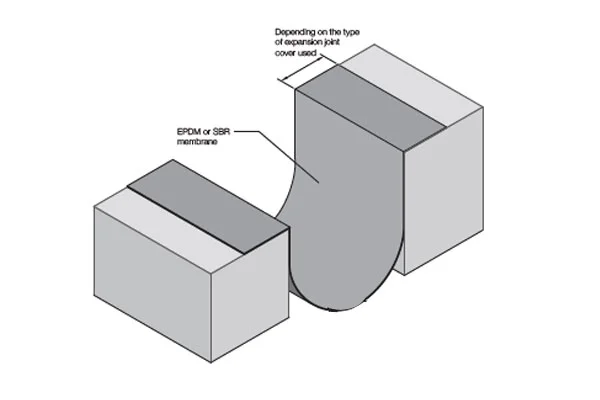
- Waterproofing Membranes: These are fundamentally your project’s first line of defense. They provide a watertight seal over the surface and act as moisture barriers.
The choice of membrane often depends on environmental factors, such as the weather conditions in your area.
- Sealant Types: Different sealants cater to different needs. Some are designed for specific surface treatments, while others are multipurpose.
It’s important to make product comparisons before settling on a sealant.
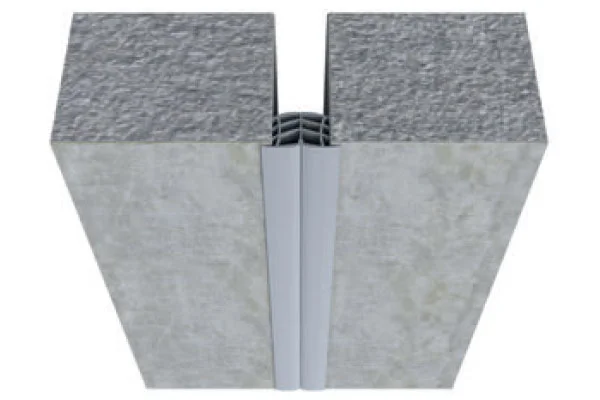
- Drainage Solutions: Proper drainage is a key component of any waterproofing project.
Without it, water can pool and penetrate your defenses, leading to damage.
Step-by-Step Waterproofing Guide
Armed with your knowledge of essential waterproofing materials, you’re ready to tackle your project head-on.
But before you do, you’ll need to understand the correct waterproofing techniques and material selection.
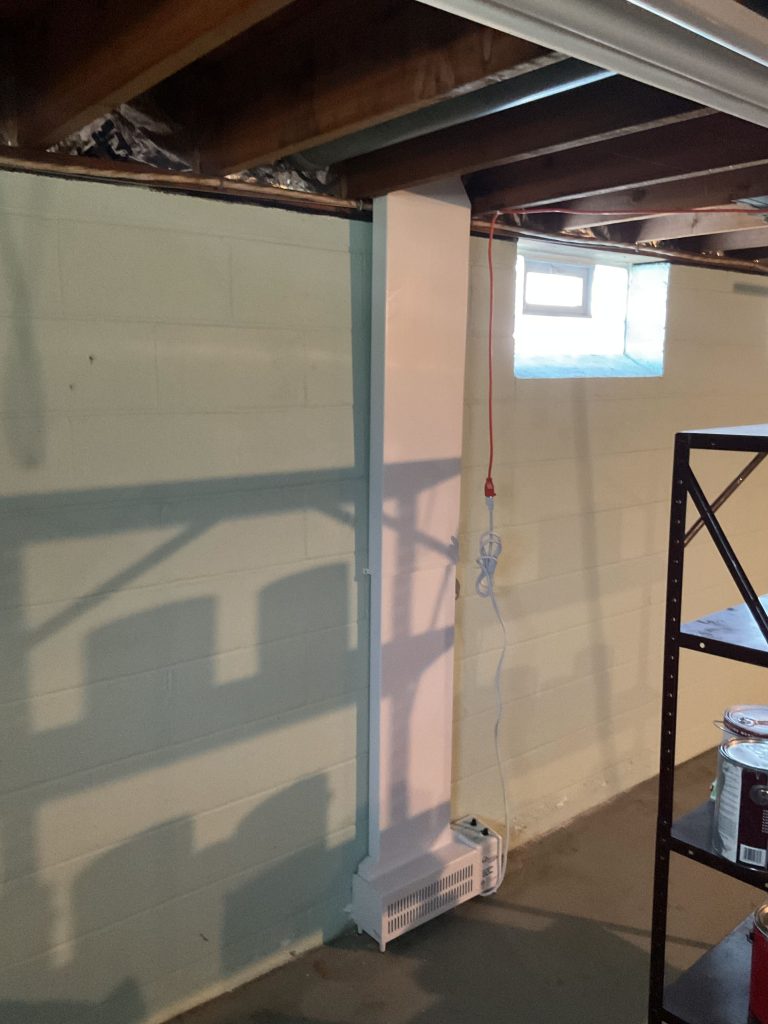
Firstly, identify the areas that need waterproofing. Pay special attention to the places where water seepage is most likely to occur, like basements, bathrooms, and kitchens.
Once you’ve pinpointed these areas, it’s time to choose the right materials. Base your material selection on the type of surface you’re working with, whether it’s concrete, wood, or tile.
Now, it’s time to prepare the area. Clean the surface thoroughly, removing any dirt, dust, or loose paint. This will guarantee the waterproofing material adheres properly.
Next, apply a primer if necessary. Some waterproofing materials require an undercoat, while others don’t. Make sure you understand your chosen material’s specifications.
Finally, apply the waterproofing material. Use a brush or roller, depending on the material’s consistency and your personal preference.
Apply at least two coats to guarantee full coverage.
Common DIY Waterproofing Mistakes
You’ve got the basics down, but now it’s essential to understand the common mistakes in DIY waterproofing.
We’ve all overlooked surface preparation, misapplied sealant, or neglected regular maintenance.
Let’s break down these errors to help you avoid them in your own waterproofing endeavors.
Overlooking Surface Preparation
In the domain of DIY waterproofing, one mistake often made is overlooking the importance of proper surface preparation. It’s not enough to merely buy the right products. Your waterproofing project’s long-term performance and your user experience depend heavily on the initial steps you take.
- Surface Cleaning: This step is critical. You can’t just slap waterproofing materials on a dusty, dirty surface and expect it to work. Properly clean the surface to guarantee ideal adhesion and longevity.
- Substrate Assessment: This involves checking the surface for cracks, rough patches, and moisture levels. Address these issues before moving on to waterproofing. It’s an essential step for moisture control and to prevent future problems.
- Product Selection: Always consider the environmental impact of the products you choose. Some materials may be harmful if not handled correctly. Research your options and select products that aren’t only effective but also safe for the environment.
Overlooking these steps can compromise your application techniques, resulting in poor waterproofing quality.
Improper Sealant Application
Having prepared your surface meticulously, it’s easy to think the hard part is over. But the real challenge lies in the correct application of sealants. Different sealant types require specific application techniques. You may have chosen the best product, but if applied improperly, it won’t deliver the expected results.
Product selection should be based on surface compatibility. Not all sealants work well on every surface. You’ve got to guarantee your chosen sealant is compatible with your surface. Long term durability should also be considered in product selection. If your sealant can’t withstand environmental factors, it’s not worth it.
While applying, weather considerations are vital. Some sealants require specific weather conditions for peak performance. So, plan your project accordingly. Don’t rush into applying the sealant. Preparation essentials are key, and repair methods should be on hand if the application goes awry.
Inaccuracy in application techniques can lead to cracks, bubbles, or incomplete coverage, reducing the sealant’s effectiveness. So, take your time, do your research, and apply the sealant correctly. This will guarantee your DIY waterproofing project is a success, saving you money and maintaining quality.
Neglecting Regular Maintenance
Even if you’ve nailed the application process, your job is far from over. One common mistake is neglecting regular maintenance of your waterproofing. To guarantee the material’s lifespan and maintain structural integrity, it’s vital to stick to maintenance schedules.
- Preventative measures: These are the key to the long-term benefits of waterproofing. This could include checking for surface deterioration and making seasonal adjustments based on weather impacts.
- Routine inspections: These allow you to spot early signs of wear and tear, enabling timely repairs. You’re not just looking for obvious signs of leakage, but also subtle signs such as discoloration or peeling.
- Environmental factors: Consider how these may affect your waterproofing. For instance, areas with high rainfall might require more frequent checks.
Ignoring these steps could lead to damage that goes beyond surface deterioration, threatening the structural integrity of your property.
Ensuring Quality in DIY Projects
Quality matters, especially when you’re going the do-it-yourself route. Your project’s success hinges on quality assurance, which starts with thorough project planning. This involves a complete skills assessment.
If you’re up to the task, your next step is material selection. You’ll want to choose products that guarantee long term durability.
Considering the environmental impact is also essential. Opt for eco-friendly materials that don’t compromise on efficacy. Remember, a quality project is also a sustainable one.
Once you’ve got your materials, you’ll need to test them. Various testing methods are available depending on the materials you’re using. This step is critical; it verifies that your chosen materials will stand the test of time.
Tips for Successful Waterproofing
Now that you’ve gathered your materials and tested their durability, it’s time to get into the nitty-gritty of your project – waterproofing. Waterproofing isn’t just slapping on a coat of sealant; it’s a careful process that involves precise technique and suitable materials.
Your first step should be material selection. Choose materials that aren’t only water-resistant but also compatible with your building’s structure. This avoids potential damage and guarantees longevity.
Next, consider the following waterproofing techniques to guarantee the success of your project:
- Surface Preparation: Clean the surface thoroughly before applying any waterproofing product. Any dirt or debris can decrease the product’s effectiveness.
- Application: Apply your chosen waterproofing product evenly. Uneven application can lead to weak spots where water can seep through.
- Regular Maintenance: No waterproofing method is 100% foolproof. Regular check-ups and touch-ups guarantee your waterproofing stays effective.
When to Hire a Professional
Despite your best efforts, there may come a time when your DIY waterproofing project becomes too complex to handle alone. The signs of urgency may not be immediately apparent, but when you notice escalating problems or the project scale becomes overwhelming, it’s time to reflect on hiring a professional.
If you’re dealing with a large area or multiple rooms, the scope of the project can quickly become intimidating. Professionals have the experience and equipment to handle large-scale jobs efficiently and effectively, ensuring the quality isn’t compromised.
Additionally, if you’re facing issues that demand immediate attention, such as water seeping into your home’s foundation, it’s essential to act swiftly. These signs of urgency require professional intervention to prevent further damage and costly repairs down the line.
DIY Waterproofing: Worth It or Not?
Starting on a DIY waterproofing project might seem like a challenging task. However, by understanding the right DIY techniques and choosing the appropriate waterproofing materials, you can tackle this project head-on.
It’s important to perform a cost benefit analysis before starting. Remember, the objective here isn’t just to save money, but to guarantee quality and longevity.
Homeowner experiences often vary. Some find the process straightforward, while others may struggle. Here are three common misconceptions to be aware of:
- It’s too time-consuming – Proper project timelines can help manage this concern.
- It’s too complex – With the right DIY techniques, it’s manageable.
- The results won’t last – If you choose durable waterproofing materials, long-term effects are positive.
Seasonal considerations also play a role. Starting your project in the right season can make a big difference in both the ease of installation and the environmental impact.
Frequently Asked Questions
What Risks Are Associated With DIY Waterproofing Projects?
Yes, there are risks associated with DIY waterproofing projects.
If you’re not careful with material selection, you might end up with subpar products that won’t last long.
There are also cost implications. You could save money upfront but end up spending more in the long run if the job isn’t done correctly.
Plus, without expert knowledge, you may miss hidden damage or issues that a professional would catch.
How Long Does a DIY Waterproofing Project Typically Take?
The duration of your DIY waterproofing project depends on several factors.
It’s largely influenced by the size of the area you’re waterproofing and your choice of materials. If you’re using a simple sealant on a small area, you might finish in a day.
But if you’re tackling a larger space with more complex materials, it could take several days.
Are There Specific Building Codes I Need to Follow for Waterproofing?
Yes, there are certain building codes you’ll need to follow when waterproofing.
These rules vary by location, so it’s essential to check with your local building department. You’ll likely need permits, especially for significant changes.
The codes also guide your choice of waterproofing materials, ensuring they’re safe and effective.
Can DIY Waterproofing Affect My Home Insurance?
Yes, DIY waterproofing can potentially affect your home insurance.
Insurance companies often have specific requirements and standards for home improvements and repairs. If you don’t meet these standards, you may face liability concerns.
Your insurance coverage mightn’t extend to damage caused by poor DIY work. So, it’s essential to check with your insurance provider before undertaking any DIY waterproofing projects to guarantee you won’t unintentionally void your policy.
What Are Some Signs of a Failed DIY Waterproofing Job?
You can spot a failed DIY waterproofing job by several key signs.
Look for failed seals around your windows, doors, or in your bathroom. These may let in water, causing moisture spots on your walls or ceiling.
Also, if you’re finding mold or dampness in your basement or other areas, it’s likely your waterproofing attempt didn’t work out.
Don’t ignore these signs; they’re your home’s cry for professional help.
Conclusion
So, can you save money with DIY waterproofing without skimping on quality? Absolutely! With careful planning, the right materials, and a good dose of patience, you can achieve professional-grade results. But remember, it’s okay to call in the pros if the task seems too intimidating. It’s about balancing cost savings and quality work. With the right approach, DIY waterproofing can be a win-win for your wallet and your home.