Installing cement board is the standard underlayment for ceramic, porcelain, or stone tile laid with thin-set mortar adhesive. Cement board is the backer board for most floor tiles, and plywood and drywall backer materials have been replaced by it for wall-tile applications in wet areas like showers and tub surrounds.
For a DIY tiling project, you need to know how to install cement board. Here’s how.
The Spruce / Liz Moskowitz
What Is Cement Board?
Cement boards are thin sheets formed from cement and reinforcing fibers. They create a durable, stable base for tile and resist mold, rot, shrinkage, or decomposition from moisture. Ceramic tile laid over cement board is one of the most durable floor or wall surfaces you can install.
Cement board is most commonly sold in 3 x 5-foot sheets with thicknesses ranging from 1/4 to 5/8 inch. A 3 x 5 panel of 1/4-inch cement board weighs about 30 pounds; a 1/2-inch sheet weighs 36 to 44 pounds. Larger, 4 x 8-foot panels are also available, but their weight is difficult for DIYers to maneuver. Thicknesses vary based on how it’s being used:
- Floors: A 1/4-inch minimum thickness is needed, but thicker panels are also acceptable.
- Walls: Use 1/2-inch or 5/8-inch-thick cement board, not 1/4-inch. Extra thickness is needed when spanning the studs, which provides a solid base for the tile.
- Countertops: 1/4-inch, 1/2-inch, or 5/8-inch-thick panels are all suitable for countertops.
Need more help? Talk to a siding expert
Our partners can help you compare quotes from top-rated professionals near you
The offers that appear in this table are from partnerships from which The Spruce receives compensation.
Instructions
How to Install Cement Board on Floors
-
Plan the Installation
- Make a rough plan for the cement board sheet layout based on the area to be covered and the size of the cement board sheets.
- Offset the joints between the cement board sheets by the joints in the plywood (or other) subflooring by at least 8 inches to provide maximum floor stiffness.
- Create an offset (if necessary) by starting the first row of sheets with a partial sheet.
Tip
There is no need to install cement backer board on a concrete substrate—ceramic tile can be applied directly over concrete, provided the surface is flat, smooth, and free of significant cracks. Add a decoupling membrane to prevent concrete cracks from transferring to the tile.
-
Cut the Cement Board
Cement boards can be cut with a utility knife and a T-square. To make round or curved cuts, use a jigsaw with a carbide blade, drill, and hole saw bit.
- Score the cement board deeply with two or three passes with the knife, using the square to ensure a straight line.
- Snap the waste area of the sheet back to break the board along the cutting line.
- Cut the fiberglass mesh along the backside of the board, as applicable, to complete the cut.
Credit: The Spruce / Liz Moskowitz
-
Mix and Apply the Mortar
- Mix a small batch of thin-set mortar as the manufacturer directs, mixing the dry powder with water in a bucket.
- Apply a mound of mortar to the subfloor, then spread it out in an even layer using a 1/4-inch notched trowel.
- Cover an area just large enough for the first cement board sheet.
Credit: The Spruce / Liz Moskowitz
-
Install the First Sheet
- Place the first sheet over the mortar bed. If applicable, the rough or embossed surface of the sheet should face up.
- Allow a 1/4-inch gap between the edges of the sheets and all surrounding walls.
- Fasten the sheet with cement board screws, using a drill-driver, making sure the screws are flush with the surface of the sheet or are slightly recessed.
- Space the screws 8 inches apart across the entire sheet.
Credit: The Spruce / Liz Moskowitz
Tip
Use only cement board screws and alkali-resistant cement board joint tape. Standard screws and drywall joint tape will corrode or deteriorate from contact with the cement board.
-
Install the Remaining Sheets
- Apply mortar using the same techniques, lay and fasten the remaining sheets in the first row, and continue installing sheets to cover the entire area.
- Space them 1/4 inch apart and leave a 1/4-inch gap at all walls.
- Keep offsetting the joints between the cement board and any underlying plywood and to gap the cement board sheets by 1/4 inch.
- Mix fresh mortar only as needed to prevent it from drying before you can use it.
Credit: The Spruce / Liz Moskowitz
-
Tape and Mud the Joints
- Apply cement board joint tape to all of the joints between sheets.
- Mix more thin-set mortar and, using a drywall knife, cover the taped joints with a thin layer, similar to mudding drywall joints.
- Tool the mortar with the knife so the tape is covered and the joints are flat and smooth.
- Allow the mortar to cure completely, following the manufacturer’s recommended drying time.
Credit: The Spruce / Liz Moskowitz
How to Install Cement Board on Walls
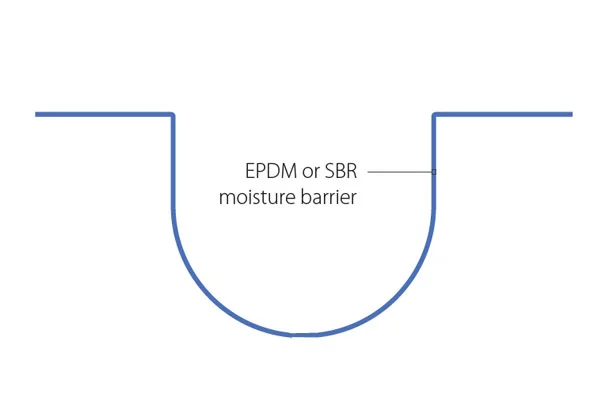
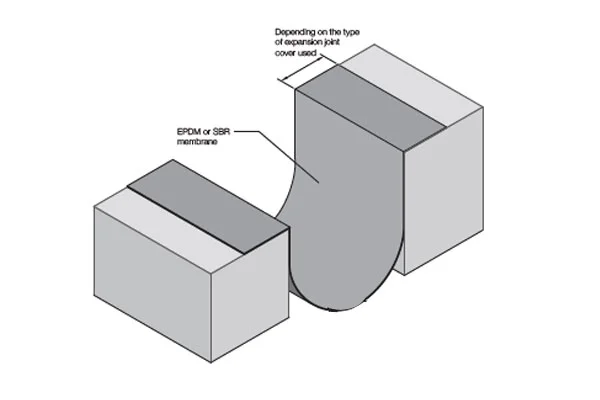
Affixing cement boards on walls uses the same techniques as flooring, but the biggest difference is it does not need a layer of mortar behind the cement board. It is screwed directly into the wall studs. Consult the cement board manufacturer for recommendations on using a moisture barrier between the board and the wall studs, such as thick plastic sheeting or another type of water-resistant membrane.
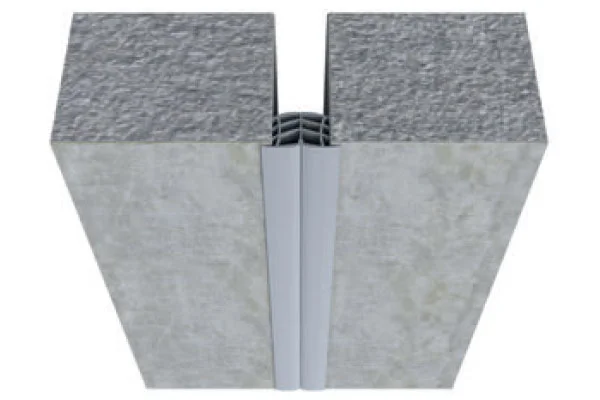
- Place the cement boards: Stagger the cement boards, ensuring that four corners never meet. Avoid forcing the boards together. Leave a slight gap for the expected expansion and contraction of the base materials and studs. Similarly, avoid forcing the edges of cement boards against floors, ceilings, or other surrounding areas.
- Screw the boards in place: Screw the cement boards onto the wall, placing the screws every 8 inches. Every stud that runs behind or along the perimeter of a cement board must be fastened to the board.
- Tape the joints: Apply fiberglass mesh tape to all the seams. Wherever tape strips meet, be sure to overlap them slightly. Avoid doubling up the tape.
- Fill the joints: Use the drywall knife to apply thin-set mortar to all taped joints. Force the mortar through the holes in the mesh tape. Run the knife along the top of the seam to even it out on each side.
- Feather the joints: If there are humps of thin-set mortar, feather the mortar out across the board. The cement boards must be as flat as possible for correct tile installation. To feather, begin the knife on the highest area, then drag the knife, gradually reducing the amount of mortar.
Tip
Never install cement boards directly over drywall or green boards in wet areas. Instead, remove the existing surface material, then install the cement board over the studs and membrane, as applicable.
When to Call a Professional
Installing cement boards in shower stalls and bathtub surrounds can be more difficult because the areas need to remain watertight. For wet areas, you may want to call tile installers.
FAQ
-
Should I glue or screw down cement board?
Always screw down cement board using special cement board screws. The screws are coated steel to resist corrosion. The grooves are specially made to dig into the cement board.
-
Do I need to pre-drill to install cement board?
Pre-drilling is always recommended before attaching the screws.
-
Which way should cement board be hung on walls?
It doesn’t matter what side faces outward or if you hang the boards horizontally or vertically.