Skip to content

Basement water intrusion affects nearly 98 percent of homes at some point, turning small leaks into mold, structural damage, and costly repairs. By understanding how waterproofing products function, from paints and liquid rubber to membranes and cements, homeowners can decide when a weekend project suffices and when expert intervention is essential. This guide unpacks:
- The range of DIY waterproofing products and their core features
- Common homeowner errors and how to avoid them
- A side-by-side comparison of DIY versus professional solutions
- Best practices, project suitability, environmental impacts, and lasting performance
With clear definitions, practical examples, and advanced comparisons, you’ll gain the confidence to tackle minor issues safely and recognize when to call in a pro.
What Are the Different Types of DIY Waterproofing Products?
DIY waterproofing products encompass a variety of materials designed for easy homeowner application to prevent water intrusion. These solutions form protective layers, seal cracks, or block moisture through chemical barriers, offering affordable, short-to-medium-term defense against dampness. For example, a single coat of cementitious paint can temporarily stop seepage in a clean, primed basement wall.
Below is a breakdown of major product categories, highlighting each material’s primary function and homeowner benefit.
| Product Type | Primary Function | Key Benefit |
|---|---|---|
| Waterproofing Paint | Forms a water-repellent coating | Easy brush or roller application |
| Liquid Rubber | Creates a seamless elastomeric membrane | Flexible expansion with wall movement |
| Sealants & Cement | Fills cracks and gaps | Rapid setting to stop active leaks |
| Waterproofing Membranes | Provides durable moisture barrier | High puncture resistance and longevity |
Each category targets specific issues and surfaces, preparing us to explore their unique pros, cons, and best use cases in detail.
What Are Waterproofing Paints and Their Pros and Cons?
Waterproofing paints are polymer-modified coatings that bond to masonry and concrete, blocking capillary moisture through a hydrophobic film. They improve wall breathability while resisting mild hydrostatic pressure.
Pros:
- Quick application with standard tools
- Affordable kit costs typically under $50 per gallon
- Low odor formulas available for indoor use
Cons:
- Limited protection against high water tables
- Requires thorough surface priming and cleaning
- Peeling risk if applied over active leaks
Selecting paint is ideal for damp patches but not for severe leaks or structural cracks. Proper surface prep and multiple coats extend its service life before reapplication becomes necessary.
How Does Liquid Rubber Work for DIY Waterproofing?
 Liquid rubber delivers a flexible, monolithic membrane by cross-linking polymers into a continuous film that adheres to concrete and wood. This coating adapts to thermal expansion and settling without cracking.
- Seamless Protection – Eliminates joints where water can penetrate
- UV Resistance – Maintains elasticity in exterior applications
- Eco-Friendly Formulation – Low VOC content ideal for interior basements
Because liquid rubber bonds to uneven surfaces and cures within 24 hours, homeowners use it for small balcony decks, planters, and foundation walls requiring a durable, flexible barrier.
When Should You Use Sealants and Hydraulic Cement?
Sealants—typically silicone or polyurethane—and hydraulic cement chemically expand to fill voids. They react with moisture to set quickly, blocking active water entry.
- Best for hairline cracks under 1/8 inch or localized leaks
- Quick cure time (5–15 minutes) prevents prolonged moisture exposure
- Incompatibility with painted surfaces may require spot-priming
Hydraulic cement works when water seeps through cracks under light pressure, while polyurethane sealants offer better adhesion and flexibility for joints around pipes or window wells.
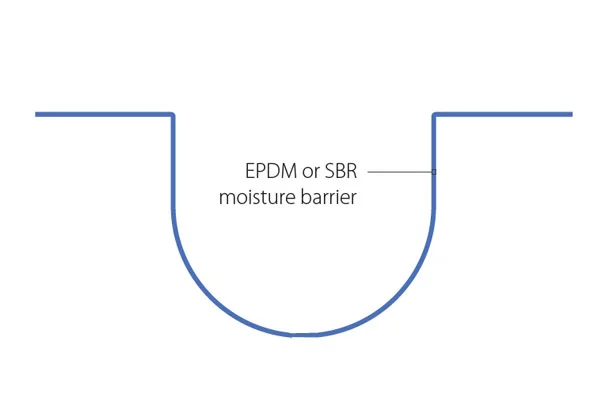
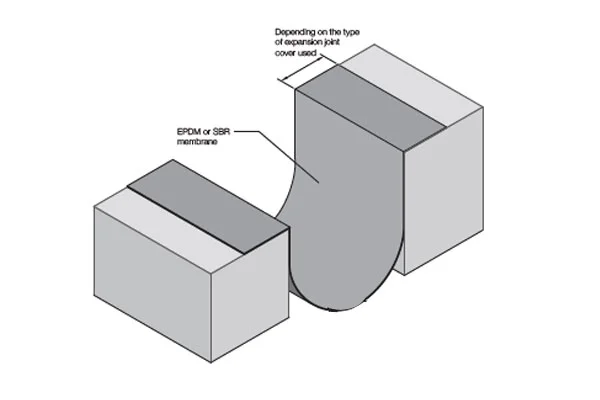
What Are Waterproofing Membranes and Are They Suitable for DIY?
Polyethylene or PVC membranes create a tough barrier applied as sheets or rolls to exterior walls. DIY kits include peel-and-stick options with self-adhesive backing.
- High tear resistance safeguards against backfill abrasion
- Provides long-term hydrostatic pressure resistance
- Installation complexity demands precise overlap and seam sealing
Homeowners can apply membranes on small sections or interior perimeter channels, but large exterior excavations and drainage integration typically require professional coordination.
What Are the Most Common DIY Waterproofing Mistakes and How Can You Avoid Them?
Homeowners often rush projects, underestimating the technical nuances of waterproofing products. Skipping key steps or misjudging water pressure leads to recurring dampness and structural damage. By recognizing five critical pitfalls, you can apply solutions correctly and prevent repeat repairs.
- Choosing the Wrong Product – Matching material properties to leak severity
- Skipping Surface Preparation – Failing to clean, prime, and repair cracks
- Ignoring Drainage and Structural Issues – Overlooking soil grading or footing drains
- Improper Application – Uneven coats, insufficient thickness, rushed curing
- Lack of Warranty and Long-Term Planning – Neglecting product guarantees and maintenance schedules
Understanding these errors lays the groundwork for reliable waterproofing and better long-term protection against water damage.
Why Is Choosing the Wrong Waterproofing Product a Critical Error?
Selecting a DIY paint for a high hydrostatic pressure scenario guarantees failure because coatings cannot withstand heavy water force. This mismatch often results in peeling paint, efflorescence, and mold within months rather than the expected years of service.
How Does Skipping Surface Preparation Affect Waterproofing Success?
Surface preparation—cleaning, etching, and priming—ensures adhesion by removing efflorescence, oil, and loose particles. Neglecting this step causes sealants and paints to lift, compromising the barrier and inviting water ingress where the film has no solid bond.
What Are the Risks of Ignoring Drainage and Structural Issues?
Without proper exterior grading, gutter extensions, or interior French drains, water accumulates against foundations. This concentrates hydrostatic pressure that overwhelms DIY coatings, leading to bowing walls, basement flooding, and accelerated material degradation.
How Does Improper Application Lead to Water Damage?
Applying coatings too thin or unevenly leaves pinholes and weak spots where moisture breaches the barrier. Rushing the curing process before a full cross-link reduces elasticity, causing cracks under thermal cycling and inviting persistent leaks.
Why Is Lack of Warranty and Long-Term Planning a DIY Risk?
Most DIY products carry limited manufacturer warranties, if any, compared to professional systems offering 10–15 year guarantees. Homeowners face full replacement costs and structural repairs when a DIY waterproofing film fails prematurely without recourse.
How Does DIY Waterproofing Compare to Professional Waterproofing Solutions?
DIY waterproofing delivers upfront savings and convenience but falls short on durability, pressure resistance, and guarantees. Professionals integrate excavation, membrane installation, drainage systems, and warranties into a holistic defense that outlasts homeowner-applied barriers.
DIY vs. Professional Waterproofing
DIY waterproofing can be a cost-effective solution for minor issues, but professional services are often recommended for more severe problems. Professionals offer comprehensive assessments, long-term solutions, and warranties, which are ideal for severe water issues.
This source discusses the benefits and drawbacks of DIY versus professional waterproofing, highlighting the importance of considering the severity of the water issues and the potential for long-term costs associated with DIY errors.
| Aspect | DIY Approach | Professional Service |
|---|---|---|
| Initial Cost | $50–$200 per area | $1,500–$5,000 with excavation and drainage |
| Durability | 1–5 years depending on product and prep | 10–15 years backed by labor/material warranty |
| Effectiveness | Effective for minor leaks and damp spots | Reliable against high water tables and pressure |
| Warranty & Guarantee | Limited or none | Comprehensive labor and materials coverage |
With clear cost, lifespan, and performance differences, homeowners can gauge when minor patchwork suffices and when professional investment is justified.
What Are the Cost Differences Between DIY and Professional Waterproofing?
DIY kits cost $50–$200 for a small basement wall but often require annual reapplication. Professional systems average $3,000 to $7,000 for a typical 1,000 sq ft perimeter yet include built-in drainage and decade-long warranties that minimize future repair expenses.
How Do Effectiveness and Durability Compare?
While DIY coatings protect against minor seepage for 1–3 years, professional solutions resist hydrostatic pressure intensively, lasting 10–15 years without recoat. This extended lifespan offsets higher initial fees through reduced maintenance.
When Should You Choose Professional Waterproofing Over DIY?
Professional intervention is recommended when cracks exceed 1/8 inch, water tables rise above footing level, or structural movement is evident. In such cases, interior coatings cannot address subsurface drainage or foundation stability.
What Warranty and Guarantees Do Professionals Offer That DIY Lacks?
Licensed contractors often back their work with labor and materials warranties covering leaks, material defects, and foundation repair for 10–15 years. These assurances transfer risk from homeowners to service providers, ensuring peace of mind.
What Are the Best Practices for Successful DIY Waterproofing Projects?
Achieving reliable DIY results hinges on disciplined preparation, correct material selection, precise application, and safety precautions. Embracing these four steps transforms a weekend project into a dependable moisture barrier.
- Surface Preparation – Clean, repair cracks, prime surfaces thoroughly
- Product Selection – Match product type to leak severity and substrate
- Application Techniques – Apply even coats, respect curing times, use proper tools
- Safety Precautions – Wear protective gear and ensure adequate ventilation
Structured adherence to these practices maximizes the effectiveness and life-span of homeowner-applied waterproofing solutions.
How Should You Prepare Surfaces Before Applying Waterproofing Products?
Begin by power-washing to remove dirt and efflorescence, patch cracks with hydraulic cement, and apply a compatible primer. This process ensures a clean, stable substrate that promotes strong adhesion and uniform film formation.
How Do You Select the Right DIY Waterproofing Product for Specific Issues?
Evaluate leak characteristics—active seepage, hairline cracks, or moisture vapor—and select a solution tailored to pressure levels and substrate porosity. Liquid rubber excels for movement tolerance, while cementitious coatings suit dry, minor dampness.
What Are the Proper Application Techniques to Ensure Effectiveness?
Use brushes for sealants in cracks, rollers for paints on walls, and squeegees for membranes on horizontal surfaces. Apply multiple thin coats rather than one heavy layer, allowing each to cure fully before the next to avoid bubbling and delamination.
What Safety Precautions Should Homeowners Take When Waterproofing?
Wear chemical-resistant gloves, eye protection, and a respirator in poorly ventilated basements. Store materials in cool, dry areas and follow manufacturer instructions for handling, mixing, and disposal to prevent health hazards.
Which DIY Waterproofing Projects Are Suitable for Homeowners and What Are Their Limitations?
Not every waterproofing task merits professional involvement. Homeowners can tackle minor projects safely when issues are limited in scope and complexity. Knowing the limits ensures efficient use of DIY efforts and prevents wasted time and materials.
- Basement Wall Sealing – Effective for damp patches but not high-pressure leaks
- Small Foundation Crack Repair – Fill hairline cracks under 1/8 inch with sealant or cement
- Shower Waterproofing – Apply tile-grade membranes behind tiles for minor dampness
- Condensation Control – Use vapor-barrier paints and dehumidifiers for humidity issues
Recognizing project scope and inherent limitations channels DIY energy toward tasks within homeowner capabilities and schedules.
How Effective Is DIY Basement Wall Sealing for Minor Water Issues?
For light moisture that does not pool, cementitious paint plus dehumidification can reduce dampness and mold growth for up to two years, provided exterior grading and gutter maintenance are adequate.
Can You Repair Small Foundation Cracks Yourself?
Filling thin cracks (less than 1/8 inch) with polyurethane sealant or hydraulic cement plugs active seepage quickly. However, cracks wider than 1/4 inch or those showing horizontal displacement warrant professional evaluation.
What DIY Solutions Work for Shower Waterproofing and Dampness?
Peel-and-stick waterproofing membranes behind tile mixed with pond-safe silicone sealant prevent grout water infiltration. Proper tile backer boards and corner flashing ensure continuous films that block moisture migration.
How Can You Address Basement Condensation with DIY Methods?
Sealing porous concrete walls with vapor-barrier paint and running a dedicated dehumidifier at 50 percent relative humidity reduces surface condensation, mold risk, and musty odors in cooler basements.
What Are the Environmental and Long-Term Impacts of Using DIY Waterproofing Products?
DIY materials vary widely in ecological footprint and indoor air effects. Understanding chemical composition, disposal requirements, and durability comparison informs greener, safer homeowner choices that minimize health hazards and waste.
- Indoor Air Quality – Low-VOC formulas reduce off-gassing and mold risk
- Chemical Disposal – Proper disposal of solvents and sealants prevents soil contamination
- Longevity – Shorter lifespans generate more material waste over time
Evaluating these factors helps homeowners choose solutions that balance performance with environmental stewardship and reduce long-term maintenance cycles.
How Do DIY Waterproofing Products Affect Indoor Air Quality and Mold Growth?
High-VOC products release formaldehyde and solvents that exacerbate respiratory issues, while porous coatings can trap moisture, fueling hidden mold colonies. Opting for low-VOC, mildew-resistant formulations protects health and indoor air integrity.
What Is the Environmental Impact of Common DIY Waterproofing Chemicals?
Solvent-based sealants contribute volatile organics to landfill leachate if improperly discarded. Water-based, cementitious coatings offer more eco-friendly profiles, with spent containers recyclable when cleaned according to local regulations.
How Does Long-Term Performance of DIY Products Compare to Professional Systems?
Because DIY coatings often require reapplication every 1–3 years, they result in greater material resource use and disposal events compared to professional membranes that last a decade or more, reducing overall environmental impact.
What Are the Most Frequently Asked Questions About DIY Waterproofing Products?
Homeowners routinely seek clarity on effectiveness, pitfalls, top products, professional thresholds, and error prevention. By summarizing these concerns in narrative form, you can quickly gauge when DIY efforts align with your home’s needs and when to engage expert services.
 Effectiveness for Preventing Water Damage

DIY waterproofing can succeed against minor leaks and dampness by creating a surface barrier, but it rarely addresses subsurface drainage or high hydrostatic pressure, making it a temporary solution in more serious cases.
Disadvantages of DIY Waterproofing
Common drawbacks include limited lifespan, absence of comprehensive warranties, risk of improper application, and inability to resolve underlying structural or grading issues that drive water intrusion.
Top DIY Waterproofing Products Overview
Leading homeowner-friendly solutions include cementitious paints for low-pressure moisture, liquid rubber for flexible membranes, polyurethane sealants for crack repair, and peel-and-stick membranes for tile areas—each matched to specific leak types.
When to Call a Professional
If cracks exceed hairline width, water tables rise above footing, walls bow, or repeated DIY attempts fail within a year, professional excavation, drainage installation, and membrane application become the prudent choice.
Avoiding Common Pitfalls
Ensure thorough surface prep, select the right product for leak severity, apply recommended thickness in multiple coats, and plan for long-term maintenance rather than one-off quick fixes.
Homeowners who balance DIY economy with realistic project scope achieve effective waterproofing without compromising structural integrity or indoor health.
Homeowners who invest the time to understand how each waterproofing product works, prepare surfaces meticulously, and recognize project limits can successfully manage minor water issues. Remember that this approach thrives when leaks are small and confined—beyond that, professional waterproofing delivers superior performance, warranties, and peace of mind. Assess your home’s specific needs, apply the best practices outlined here, and decide with confidence whether to dive into a DIY weekend project or engage seasoned experts for long-lasting protection.